


DIY Fire Fighting Robot Using Arduino and Android App Control
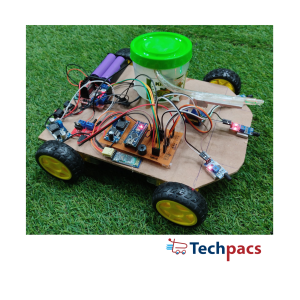
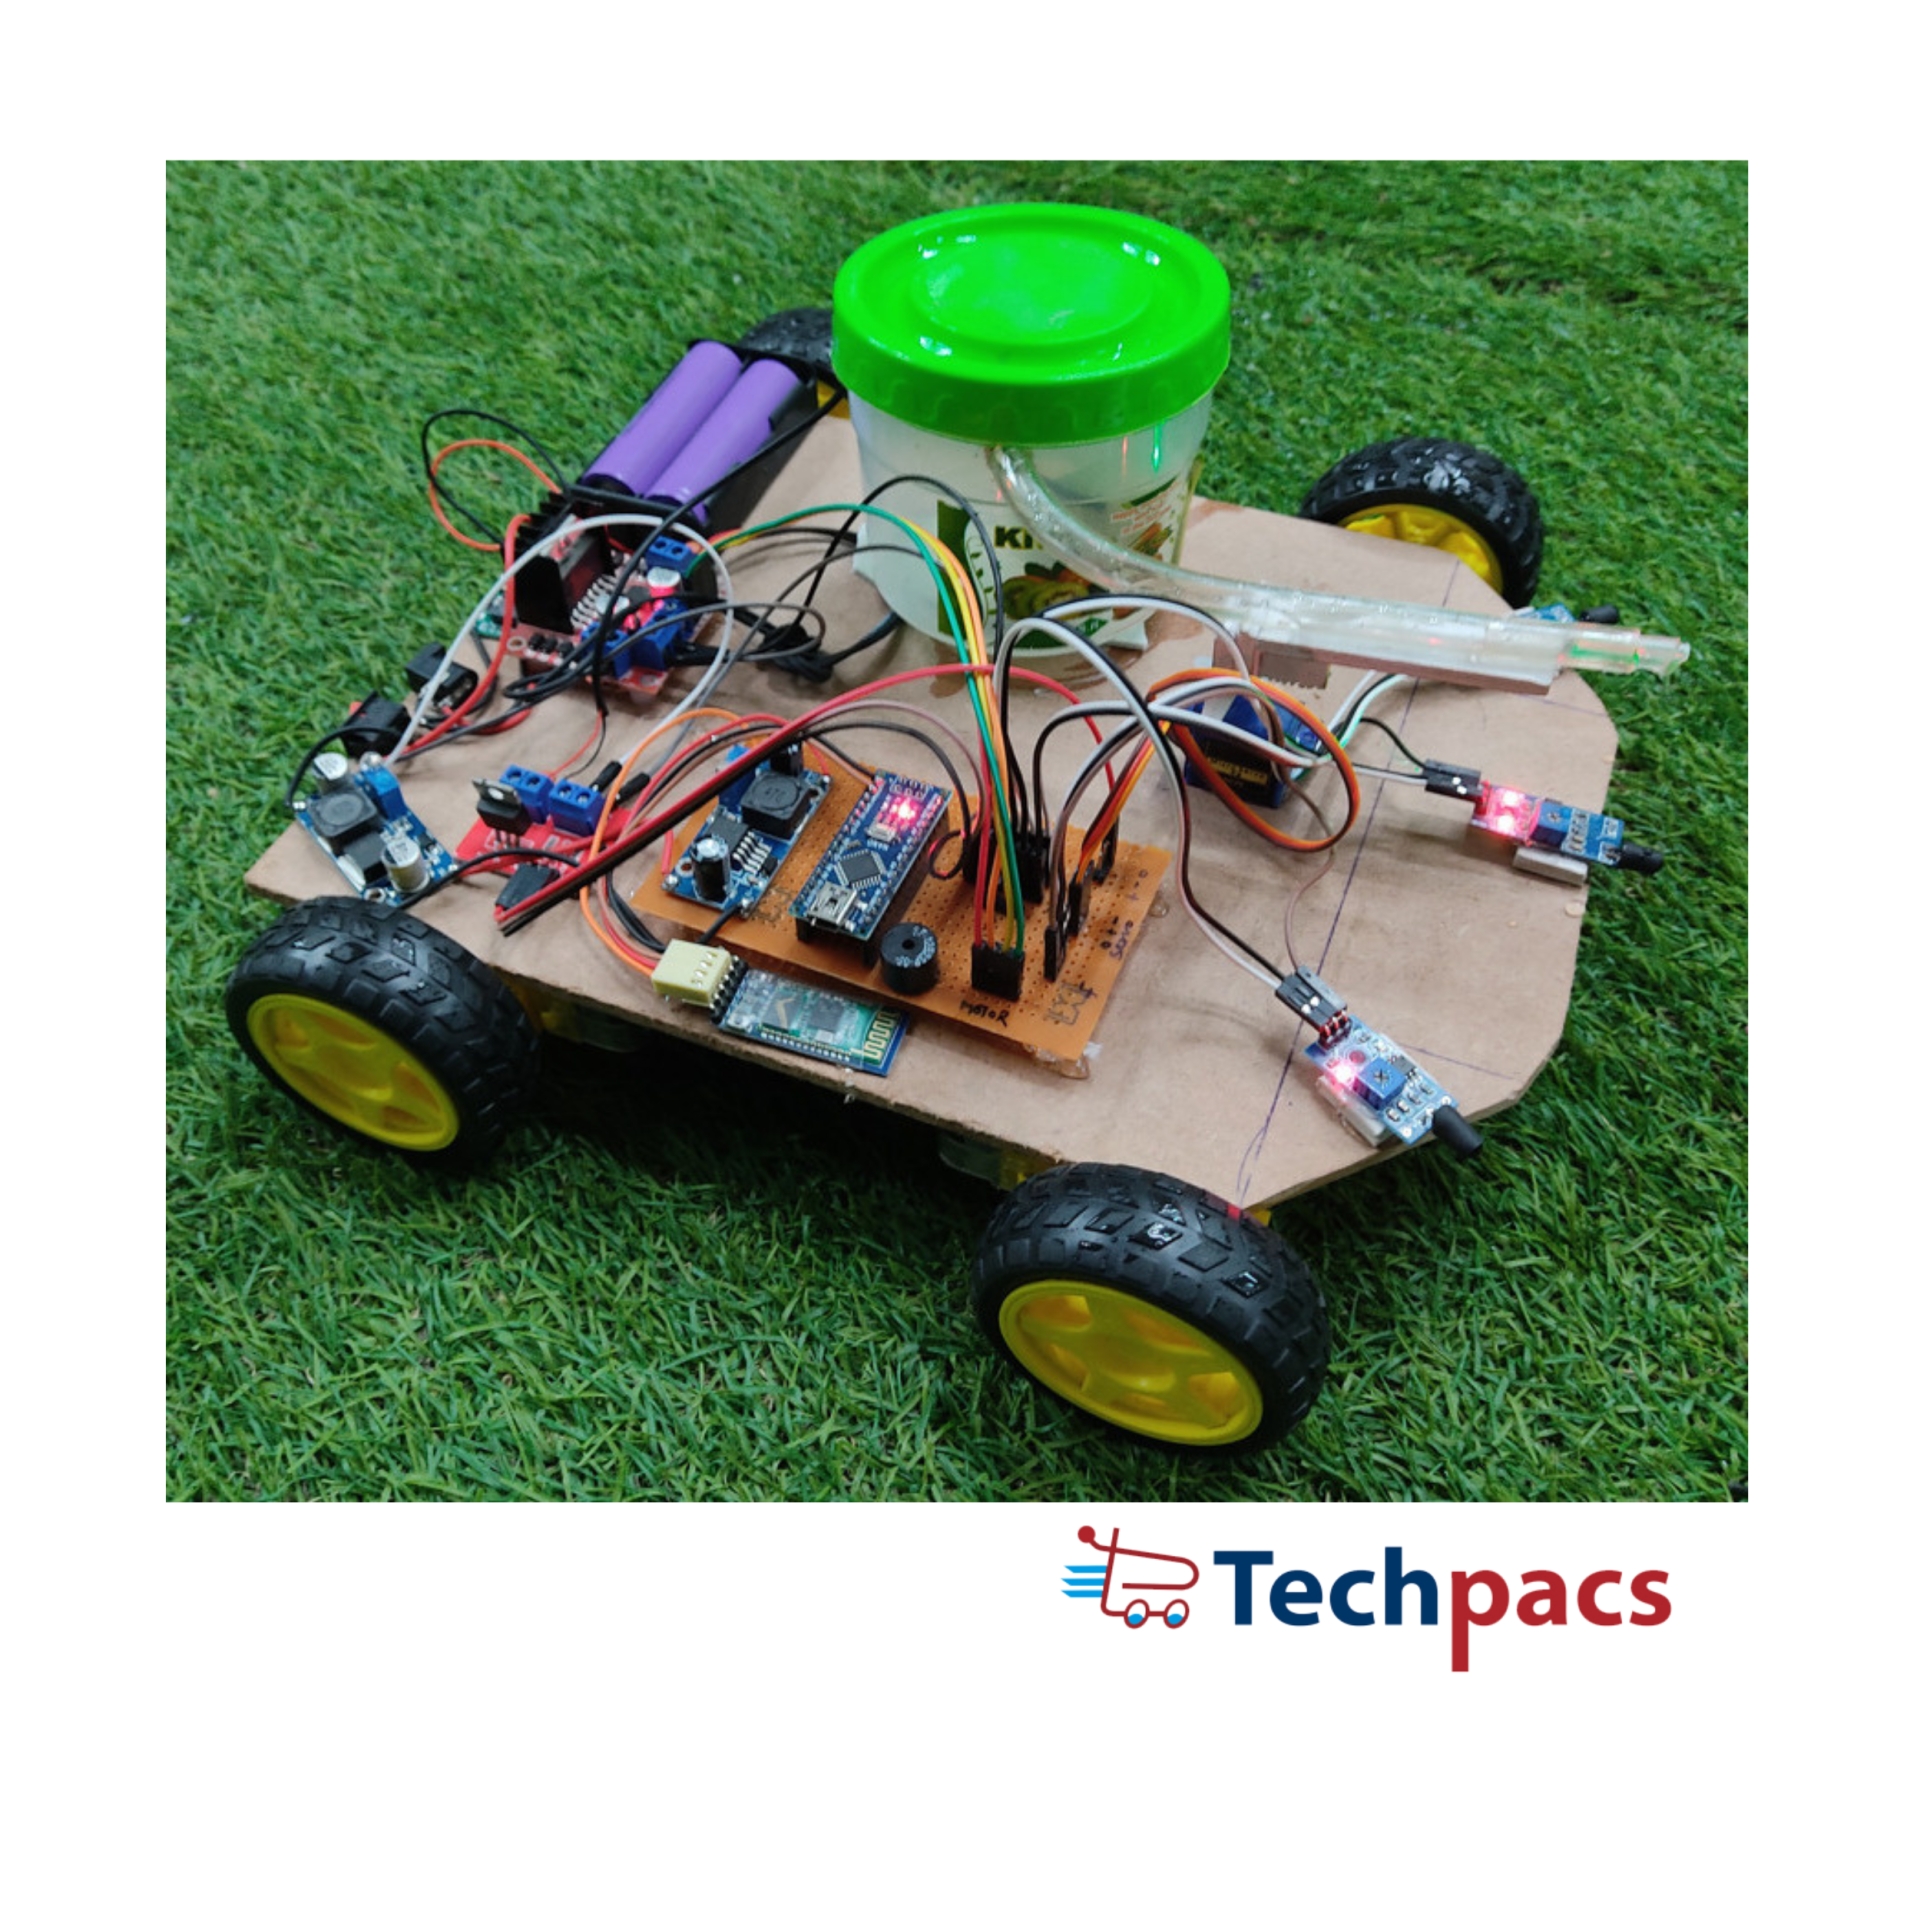
The DIY Fire Fighting Robot project aims to create an autonomous robot capable of detecting and extinguishing small fires. This robot is built using an Arduino microcontroller, which serves as the brain of the system, interfacing with various sensors and actuators. Controlled via an Android app, the robot can navigate effectively towards the fire source, leveraging flame sensors for detection. Once the fire is detected, the robot activates a water pump to extinguish the fire. This project is a practical integration of electronics, programming, and robotics to address real-world problems, showcasing a DIY approach to safety and security solutions.
Objectives
1. Design and construct an autonomous robot capable of detecting fires.
2. Implement a water pump system to extinguish detected fires.
3. Develop an Android app to control and monitor the robot remotely.
4. Integrate various sensors with the Arduino to enhance the robot's detection capabilities.
5. Ensure reliable communication between the robot and the Android device.
Key Features
1. Autonomous navigation: The robot can move around and navigate towards the fire source without human intervention.
2. Fire detection: Equipped with flame sensors to detect the presence of fire.
3. Fire extinguishing mechanism: Utilizes a water pump to extinguish the fire once detected.
4. Android app control: Provides a user interface for remote control and monitoring of the robot.
5. Real-time feedback: The robot can send real-time data to the Android app, updating the user about its status and actions.
Application Areas
The DIY Fire Fighting Robot has several potential application areas, greatly enhancing safety measures in various environments. In residential settings, it can be deployed to quickly address accidental fires, reducing the risk of property damage and personal injury. In commercial and industrial spaces, the robot can serve as an additional layer of fire safety, particularly in areas with high fire hazards. The robot can also be used in educational institutions as a practical tool to teach students about robotics, electronics, and programming, fostering innovation and problem-solving skills. Additionally, its DIY nature makes it an excellent project for hobbyists and enthusiasts interested in building and programming robots.
Detailed Working of DIY Fire Fighting Robot Using Arduino and Android App Control :
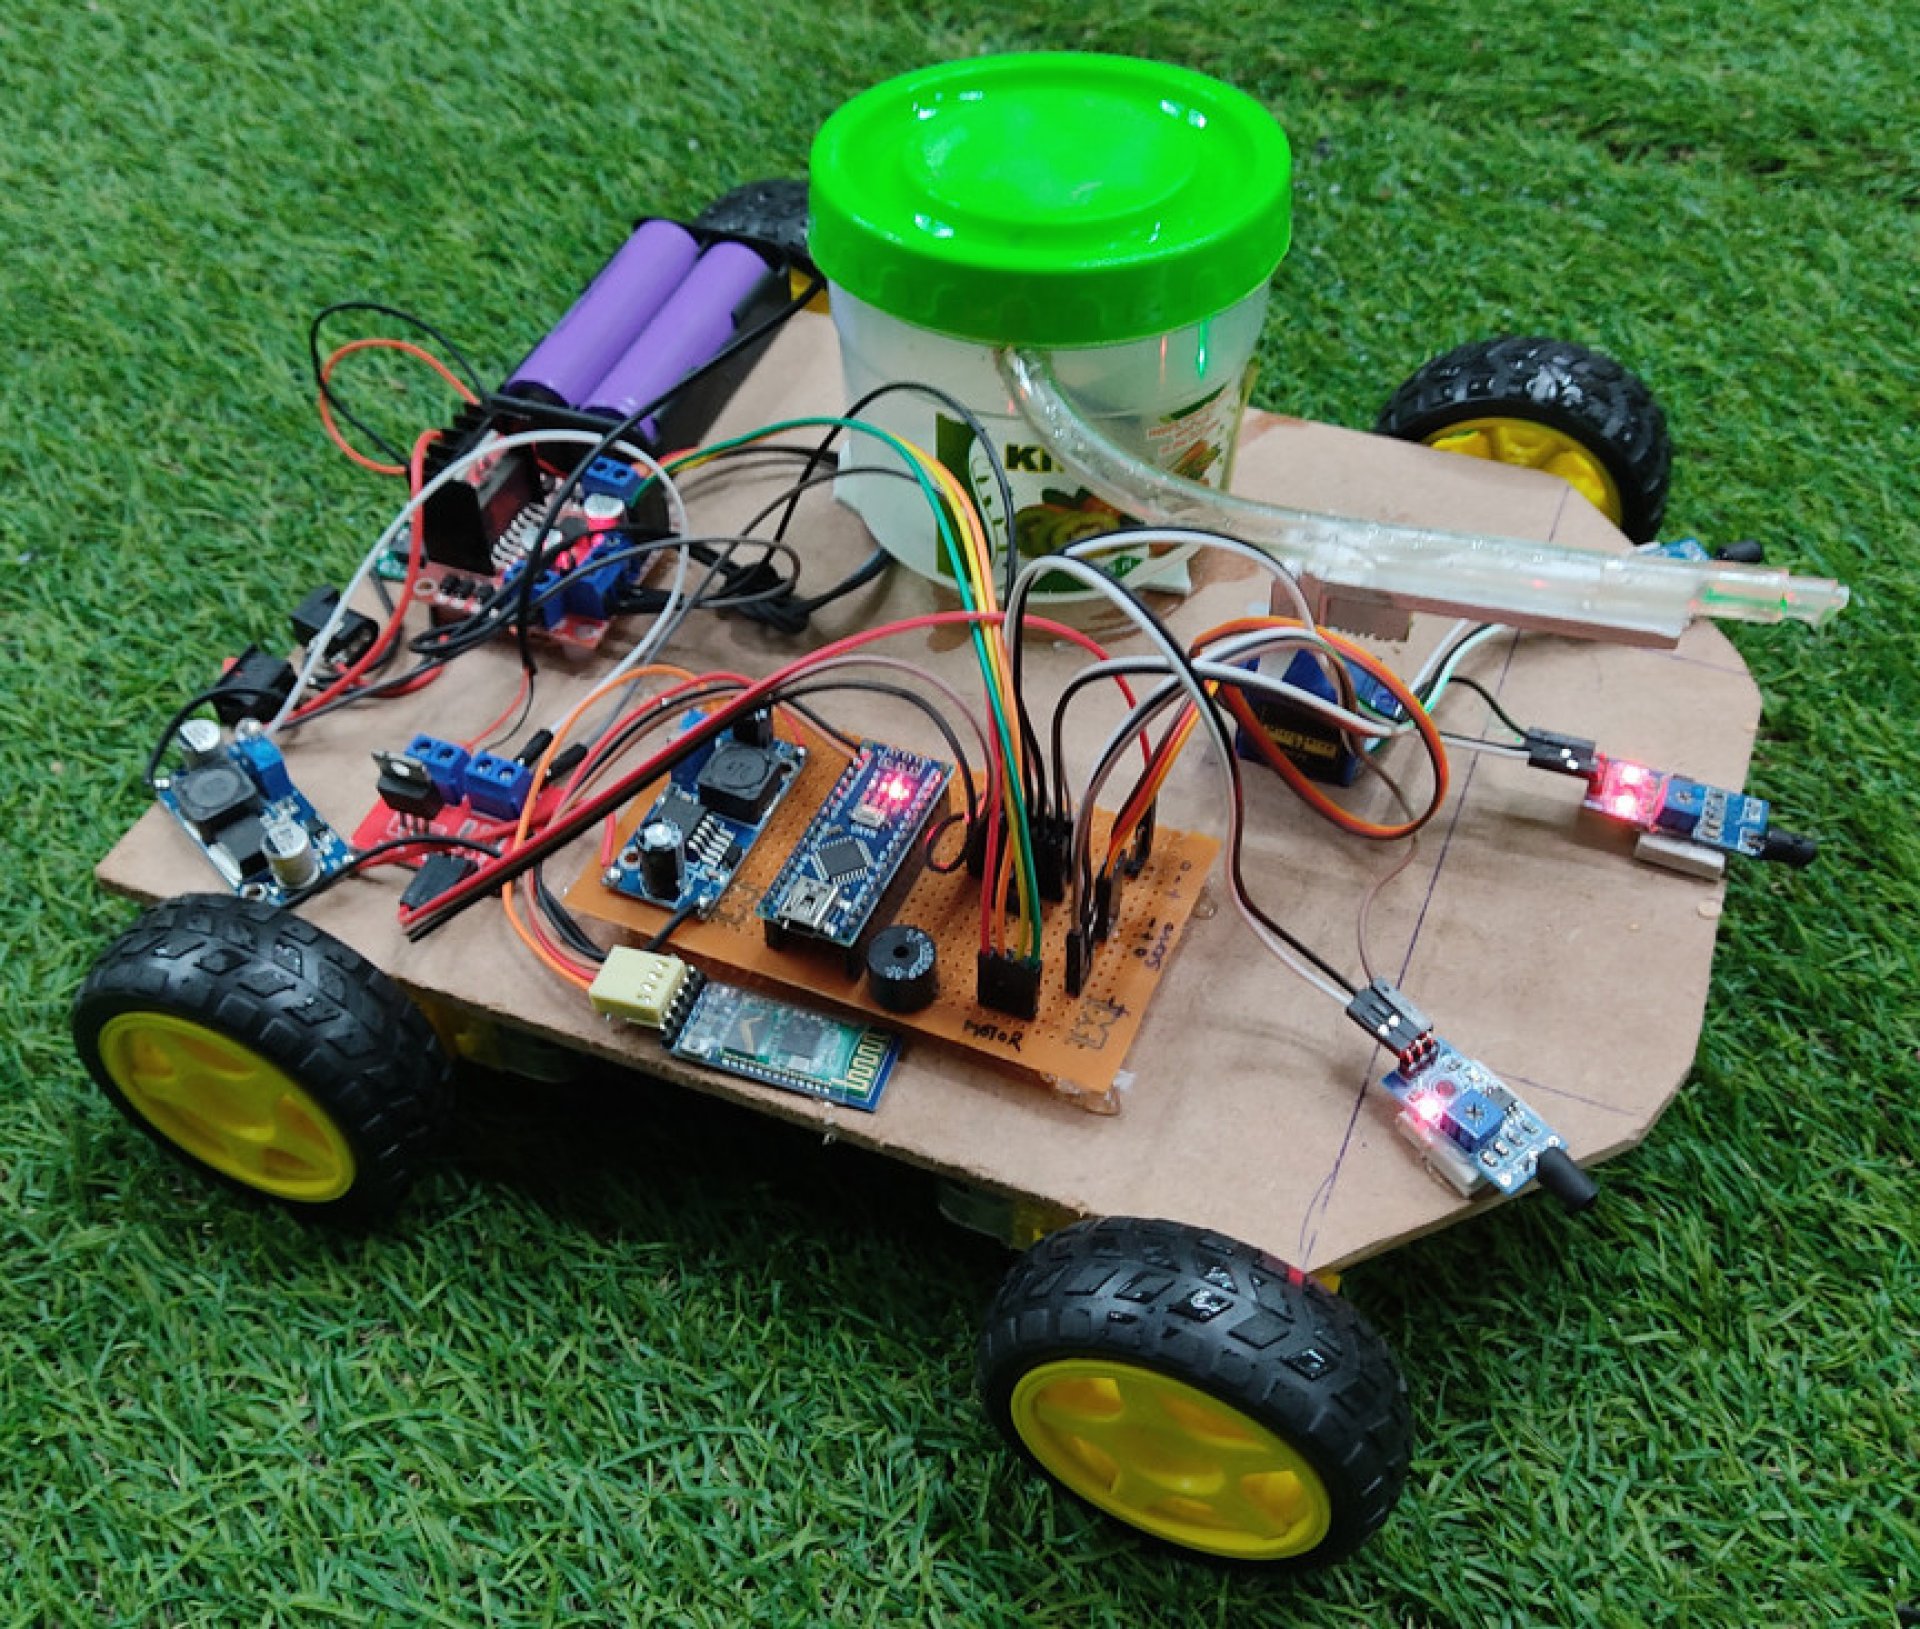
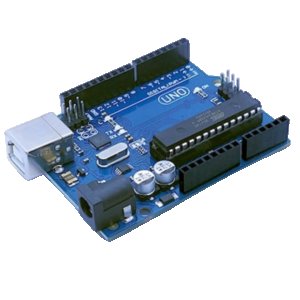
The DIY Fire Fighting Robot is an intricate system that integrates multiple sensors, an Arduino microcontroller, a motor driver, and an Android app for seamless control. At the heart of this robot, the Arduino Uno board orchestrates the various components to detect and extinguish fire autonomously or manually via Bluetooth control.
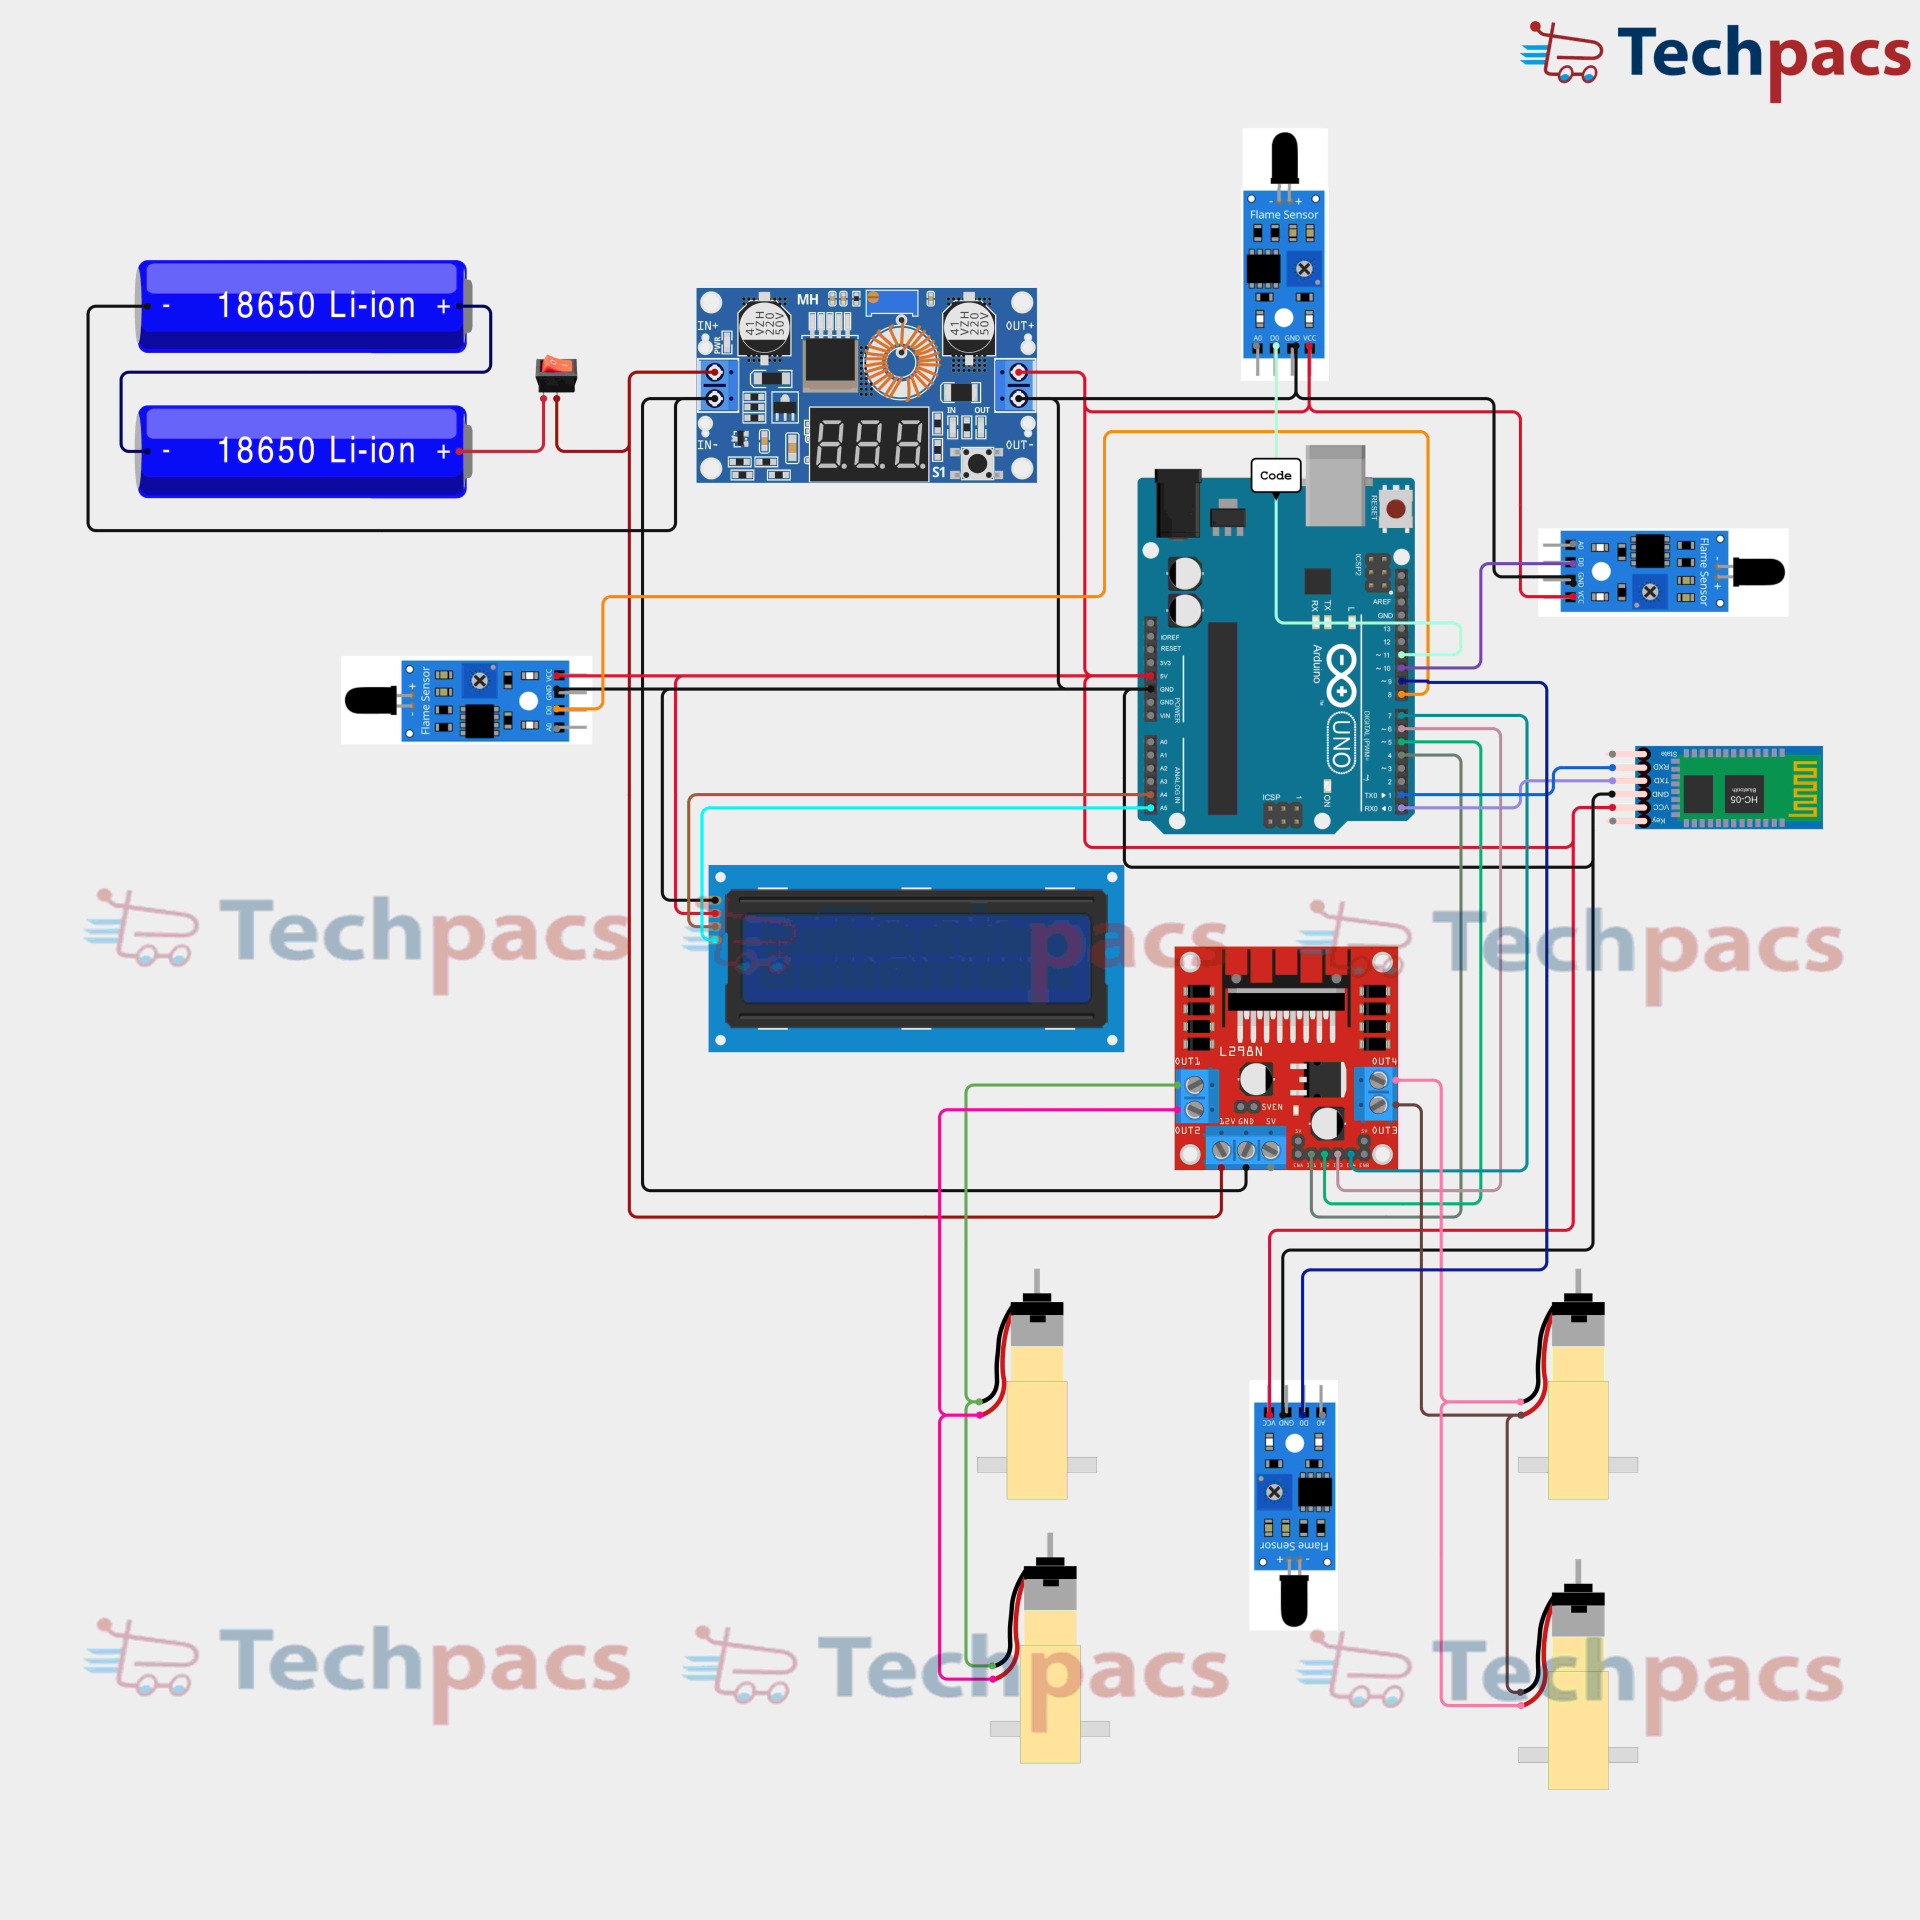
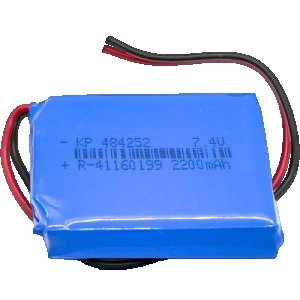
Our journey begins with the power supply. The robot is powered by two 18650 Li-ion batteries that deliver the necessary voltage through a DC-DC buck converter, ensuring a stable output to power all components. The power management is crucial as it regulates the voltage to levels appropriate for the sensitive electronics onboard.
The Arduino Uno acts as the central processing unit. It receives real-time data from several key sensors, including the flame sensors and an HC-SR04 ultrasonic sensor. Flame sensors are stationed on the robot to detect fire. When a fire source is detected, these sensors send their readings to the Arduino, triggering the fire fighting mechanism. The HC-SR04 ultrasonic sensor aids in navigation by detecting obstacles in its path.
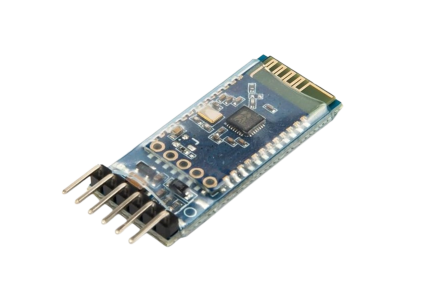
The Android app plays a pivotal role by serving as a remote control interface, communicating with the Arduino via an HC-05 Bluetooth module. The Bluetooth module receives commands from the Android app, sending them to the Arduino to maneuver the robot. This allows users to manually control the robot’s movements, providing flexibility and manual intervention capability if necessary.
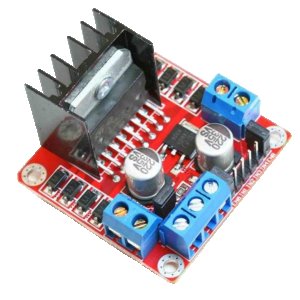
Motor control is integral to the robot’s mobility, achieved using the L298N motor driver. The L298N receives signals from the Arduino to control the direction and speed of the four DC motors connected to the robot’s wheels. The motor driver ensures the robot can move forward, backward, or turn in response to sensor inputs or manual commands via Bluetooth.
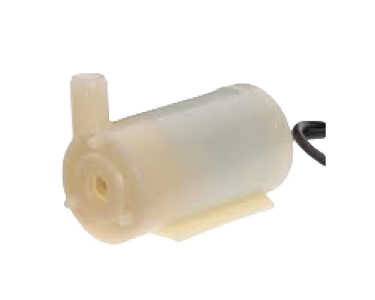
For fire extinguishing, a water pump mechanism is employed, connected to the Arduino to activate when the flame sensors detect a fire. The water pump releases a jet of water, aiming to douse the flames automatically. The Arduino controls the duration and intensity of the pump based on the severity of the fire detected by the sensors.
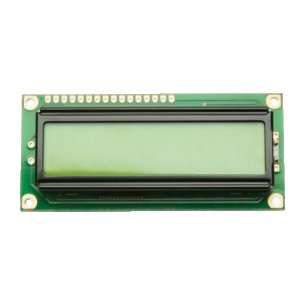
The overall status and sensor data are displayed on an LCD screen connected to the Arduino. The LCD provides real-time feedback, showcasing vital information such as sensor readings, battery status, and the robot’s current operations. This interface is instrumental for debugging and monitoring the robot’s functioning during operation.
In conclusion, the DIY Fire Fighting Robot combines the power of Arduino microcontroller, various sensors, a motor driver, and Bluetooth connectivity to create an autonomous yet manually controllable fire fighting machine. The intricate interplay of these components ensures the robot can navigate, detect fires, and extinguish them with precision and reliability, making it a remarkable integration of robotics and practical application.

Modules used to make DIY Fire Fighting Robot Using Arduino and Android App Control :
1. Power Supply Module
The power supply module is the backbone of our DIY fire fighting robot. This module consists of 18650 Li-ion batteries connected to a step-down voltage regulator module. The voltage regulator ensures a stable voltage supply to components like the Arduino, motors, sensors, and Bluetooth module. This stable power supply is crucial as it maintains the efficiency and reliability of the robot's operation. The batteries are connected in parallel to provide a higher capacity, ensuring the robot can function for extended periods. The power distribution from the regulator is fed into the Arduino board, which subsequently distributes it to other connected hardware modules.
2. Main Control Unit (Arduino)
The heart of the fire fighting robot is the Arduino board, which acts as the main control unit. It processes input signals from various sensors and outputs commands to the motor driver for movement and other peripherals. The Arduino is programmed with the logic to control the robot's behavior. It receives data from the fire detection sensor, temperature sensor, and control commands from the Android app via the Bluetooth module. Based on this data, the Arduino decides the best course of action to approach the fire and activate the extinguishing system. The Arduino also updates the LCD module to display real-time status and readings from sensors.
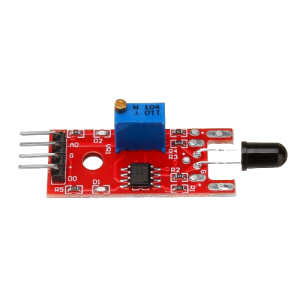
3. Fire Detection and Temperature Sensing Module
The fire detection and temperature sensing module includes a flame sensor and a temperature sensor. The flame sensor detects the presence of fire by sensing infrared light emitted by flames. The temperature sensor measures the ambient temperature to ascertain rising temperatures indicative of fire. These sensors relay their data to the Arduino. The Arduino processes this data to determine if a fire has been detected. If the flame sensor registers the presence of fire and the temperature sensor reports an increase in temperature, the Arduino triggers the robot's movement towards the fire and activates the extinguishing mechanism.
4. Motor Driver Module
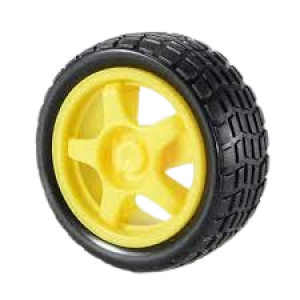
The motor driver module is responsible for driving the motors that control the robot's wheels. This module uses the L298N dual H-Bridge motor driver, which allows the Arduino to control the direction and speed of the motors. The driver supports two motors, enabling the robot to maneuver in different directions based on the signals received from the Arduino. When the Arduino detects a fire, it sends signals to the motor driver to control the robot's movement towards the fire's location. The motor driver translates these signals into the appropriate electrical inputs for the motors, thus facilitating the robot's physical movement.
5. Bluetooth Communication Module
The Bluetooth communication module, typically an HC-05 or HM-10, allows wireless communication between the Arduino and an Android app. Through this module, users can control the robot remotely using their smartphones. The Bluetooth module receives control commands from the Android app and forwards them to the Arduino. The Arduino then processes these commands and executes the necessary actions, such as moving the robot, turning on/off the extinguishing mechanism, or providing sensor feedback. This module ensures that the robot can be manually controlled, adding a layer of user intervention in case of emergencies or to guide the robot more precisely towards the fire.
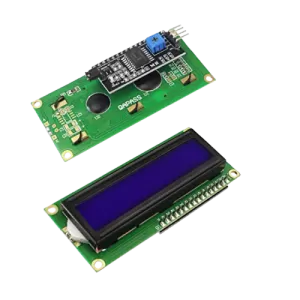
6. LCD Display Module
The LCD display module is used to provide real-time feedback and status updates about the robot's operation. It interfaces with the Arduino to display data from sensors, such as flame detection status and temperature readings, and other operational messages. This aids in debugging and monitoring the robot's status during operation. When the Arduino processes data from the sensors, it sends relevant information to the LCD display. This allows the user to view current operational details without the need for additional devices. The display module enhances the robot's usability by ensuring that critical information is always visible to the user.
Components Used in DIY Fire Fighting Robot Using Arduino and Android App Control:
Power Supply:
18650 Li-ion Batteries: These provide the necessary power for the entire circuit and components.
Voltage Regulator Module: Ensures stable voltage supply to the Arduino and other components.
Control Unit:
Arduino Uno: The main microcontroller that processes input data and controls other components.
Motor Control Module:
L298N Motor Driver: Facilitates the controlled movement of the robot by driving the DC motors.
DC Motors: Provide movement to the robot allowing it to navigate the environment.
Sensors:
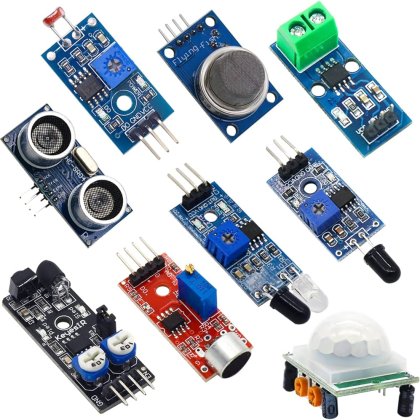
Flame Sensors: Detects the presence of fire and sends signal to the Arduino.
Temperature Sensors: Monitors the surrounding temperature to identify potential fire hazards.
Communication Module:
Bluetooth Module: Allows wireless communication with an Android app for remote control of the robot.
Display Module:
16x2 LCD Display: Displays status messages and sensor readings to the user for real-time monitoring.
Other Possible Projects Using this Project Kit:
1. Obstacle Avoidance Robot
Using the same project kit, an Obstacle Avoidance Robot can be built. This robot utilizes ultrasonic sensors to detect obstacles in its path and automatically navigates around them. The Arduino serves as the brain of the robot, processing data from the sensors and controlling the motors via the L298N motor driver. The Android app can be used to monitor the surroundings and receive real-time updates on the robot's position and performance. This type of robot is ideal for applications in automated cleaning devices, surveillance, or as a foundational project for more advanced robotics studies.
2. Line Following Robot
Another interesting project is a Line Following Robot. This robot uses infrared sensors to follow a predefined line path. The Arduino processes input from the sensors to adjust the movement of the motors, ensuring the robot stays on course. The motor driver controls the speed and direction of the robot based on the sensor inputs. The Android app can be programmed to start and stop the robot remotely. This project is useful for learning about sensor integration and control algorithms, and it has practical applications in industrial automation and transportation systems.
3. Gesture Controlled Robot
A Gesture Controlled Robot can also be made using this project kit. By integrating an accelerometer with the existing components, movements of a smartphone can be translated into commands for the robot. The Arduino reads the accelerometer data, processes the gestures, and sends signals to the motor driver to control the motors accordingly. This robot can be used in applications where hands-free operation is crucial, such as aiding individuals with mobility impairments or performing tasks in constrained environments.
4. Voice Controlled Robot
By incorporating a Bluetooth module and interfacing it with a voice recognition app on a smartphone, you can build a Voice Controlled Robot. The Arduino will receive voice commands via Bluetooth, decode them, and execute the corresponding actions through the motor driver. This project helps in exploring natural language processing and IoT integration. It can be particularly beneficial for hands-free control scenarios, personal assistants, or interactive educational tools to teach coding and robotics.
| Shipping Cost |
|
No reviews found!


No comments found for this product. Be the first to comment!